_edited.jpg)
.jpeg)
.jpeg)

.jpeg)
Mystery Boxes...A Great Way to Challenge Yourself
- Jenna

- Sep 5, 2021
- 2 min read

In July I was contacted by Kelly, the lovely owner of Eye Love Hue Paint to see if I wanted to participate in a Mystery Box Challenge. I've seen other artist receive boxes of paint and supplies, have no idea what's inside of them and just get to painting. It looked like a lot of fun, so of course I said yes! Here's the content of my box!
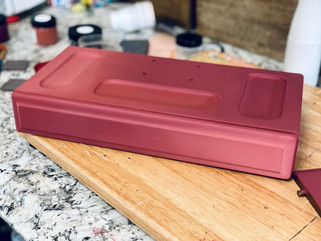
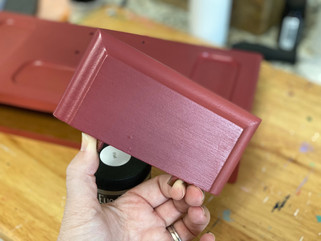
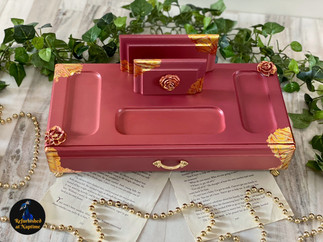
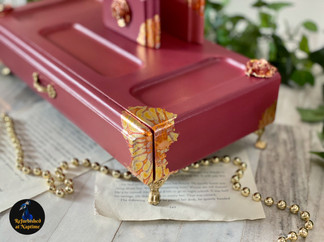
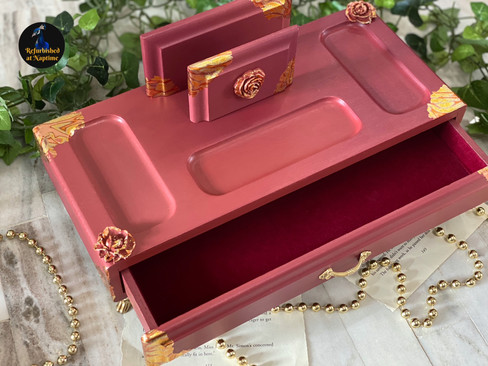
Eye Love Hue Paint in the Renewed Spirit Home Collection colors of Sangria, Dusty Desert Pink and French Kiss. All lovely shades of pinks, reds and purples. I also received a

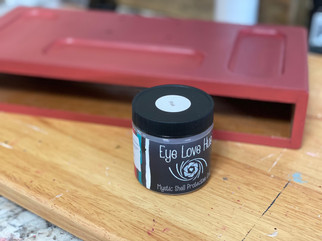
Mystic Shell clear coat, some small WoodUBend roses, a sanding pad, stencil square and some patterned gold leaf. I knew I wanted to do a random blend of the 3 colors and I had the perfect women's valet to do use them on. I got to work by removing the old lining, sanding the box down and thoroughly cleaning it. Then I was ready to apply a primer coat.

When working with lighter colors I will prime by box to block out the darker shade of the wood. The lightest color, Dusty Desert Pink, isn't as light as a typical pink shade but because I was blending I wanted to be sure none of that base brown came up. Once this was done I was ready to begin my blending. Using my Zibra Round brush I mixed my Sangria, Dusty Desert Pink and French Kiss adding bit of each color as I went. There was no rhyme or reason to where I put the different colors. Sangria is a darker shade however when mixed with the lighter colors it did tone it down a lot. I certainly could have gone darker on the Sangria and if I used these colors again I definitely will. Once my paint had time to dry I then clear coated in the supplied Flat Mystic Shell.

Now I was ready to start working on my WooduBend and my gold leafing. I heated up the WoodUBend flowers so I had a flat surface on the back of the mould using my heat gun. Once they were spongy I applied them using Gorilla Glue Wood Glue. You can find a video of how I apply my WoodUBend on my Youtube Channel or by clicking on this direct link.

I decided to apply my gold leaf to my moulds for some definition. This was the first time I had tried that and I think it definitely makes the flowers stand out more. Using my Gold Leaf Adhesive I painted it on my flowers and where I wanted it on the box. Once it became tacky I then applied the gold leaf using a sponge brush. If you want to see how I apply gold leafing you can catch a tutorial here.
Once all my gold leaf was on I did a clear coat just over the gold leaf to seal it. I used the stencil from my mystery box on the drawer sides with some gold wax and relined the drawer in Dark Red Self Adhesive Lining. I also sprayed some metal feet in gold and screwed them into the bottom of the box for some added height.


Comments