_edited.jpg)
.jpeg)
.jpeg)

.jpeg)
"Hell Hath No Fury..."
- Jenna

- Aug 3, 2021
- 4 min read

Do you ever come across something that immediately catches your eye and you have to have it?? Well that's exactly how I felt when I saw the new Decoupage Pack by Grace on Design, Fury! I LOVE IT!! The colors are so incredibly vibrant, beautiful and that Queen...oh! She is just amazing!
If you don't know anything about Grace on Design Decoupage Packs each pack includes 3 separate options:
1 sheet 24"x 36" main image
1 sheet 18"x 24" pattern image
1 sheet 12" x 18" main image
1 Rad Pad Application Pad
For this project I used the 18" x 24" Companion Pattern image of the harlequin and floral design. I even had plenty left over. In this blog you will find multiple videos of how I applied the decoupage as well as step by step of my process with refurbishing a jewelry box featuring this beautiful new Decoupage.
*This blog includes affiliate links. Purchasing through these link doesn't cost you anymore however I do receive a small commission which allows me to continue to bring you tutorials, how-to's and more amazing products. All purchases are greatly appreciated*
For this project should you wish to do something similar you will need the following tools:
Jewelry Box or any other item you wish to work on
Eye Love Hue Paint in Sangria and Missing Hue and Mystic Shell Clear Coat in Satin, Flat or Gloss
Step 1:

For this project I started with a jewelry box that was in pretty decent shape but was a bit bland. I simply removed the previous lining, cleaned the box with some White Lightning and applied a base coat of primer. Because this box was going from dark to light, at least on the bottom portion, I wanted to be sure there wasn't any bleed through.

Step 2:
Since the Fury companion paper had portions of white within the harlequin I knew I needed to paint the bottom portion white so that no other color would come through the paper. You definitely want to be sure you are applying the paper over a complimentary color within the paper. I painted the bottom portion in Eye Love Hue Paint's Missing Hue, a bright white color. I painted the top of the box in Eye Love Hue's Renewed Spirit Collection shade of Sangria. It complements the colors in the flowers perfectly!
Step 3:

I'm now ready to apply the Fury decoupage paper. There are multiple ways to apply decoupage paper: Wet Method, Spray Adhesive as well as Iron on Method. For this particular project I am using the Wet Method. This simply means I am using a clear coat product to make my decoupage paper stick to my box. I used an artist brush to apply Eye Love Hue's Mystic Shell Satin clear coat on both sides and the front. To ensure a smooth finish you will want to use each a wallpaper smoother or a brayer.
Watch this video to show 2 different options on how you can apply the decoupage paper: by applying the clear coat all at once or in sections working across your piece.

You can follow my YouTube Channel to find more how to video with the products I use.
I often feature transfers, WoodUBend, Grace on Design, simple painting techniques and Posh Chalk Interiors.
Step 4 (If your project has drawers):
When working with decoupage you have options on how you want to apply over drawers. You can either apply your decoupage and use the included Rad Pad to lightly sand off the excess or you can pre-cut your papers and then apply them individually onto the drawers. For this box I applied the paper over the drawers all at once and then used my crafter's knife to cut between the drawers. This gives me a clean and precise cut without messing up any part of the design.

You can watch a video of how I cut
between the drawers on this box here.
Step 5:

For this box I wanted to add a WoodUBend Moulding's applique for a little detail on the top of the box. I had previously spray painted this mould for another project that I ended up not using. It was perfect for the top of this box. I had already clear coated my entire piece in Eye Love Hue's Mystic Shell Clear coat so for this project I applied the moulding with less Gorilla Glue. If you haven't already clear coated you apply this with heavy glue, clean up easily, and clear coat right over the mould.

I made a video of how I applied this particular mould and how simple it is. All you need is your mould, Wood Glue and a Heat Gun. Watch the video at this link.

Step 6:
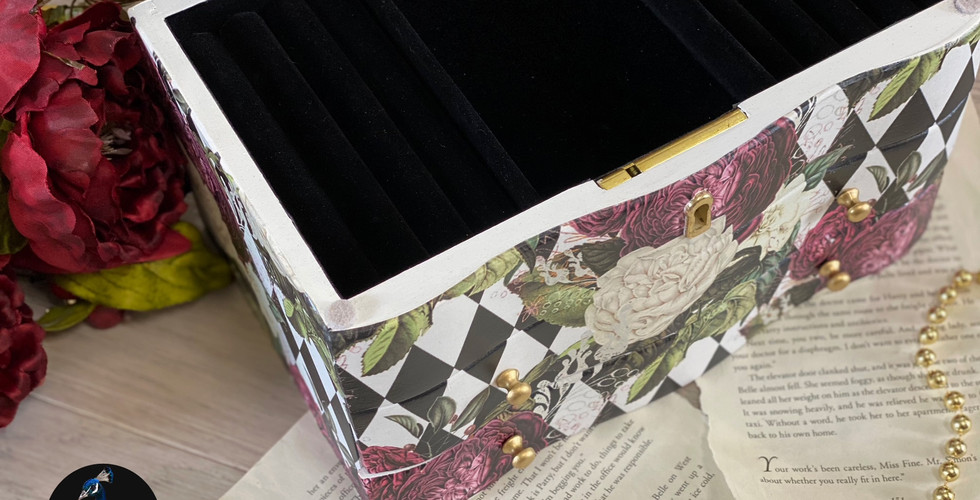
To finish off the project I re-lined the entire box in black. It really makes those lovely harlequin triangles stand out! Using the templates of the interior I pulled out from the beginning I applied Benecreat Velvet Adhesive to re-line the whole box. She is now complete!


Comments