_edited.jpg)
.jpeg)
.jpeg)

.jpeg)
"Dream Angel...Dream Angel"...How to Apply Gold Leafing
- Jenna

- May 28, 2021
- 3 min read

I LOVE gold leaf!! I love how it looks, how simple it is to apply, and how inexpensive it is. I hate the clean up but I've got a solution for that as well!
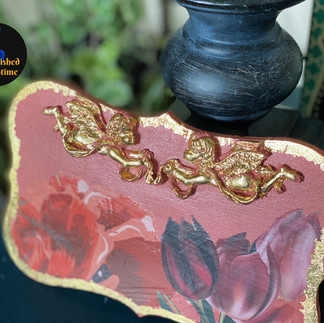
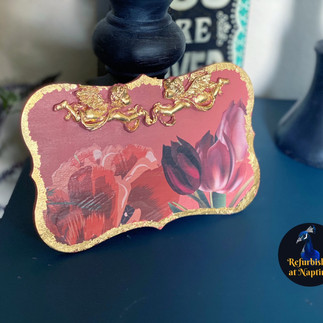
After posting about a great price on the gold leafing I use I felt like it would be fun to make a quick tutorial. I also wanted to use the new color Dusty Desert Pink from Eye Love Hue Paint (Releasing June 1st), as well as some transfers from HP Distribution LLC and these adorable cherubs from WoodUBend Mouldings. You'll find a step by step video of this same tutorial on my YouTube Channel.
**This Post includes affiliate links for products I used. Any purchases made through those links is greatly appreciated and do not cost you any additional**
For this simple project you will need:
a wooden plaque (Found mine at the $1.00 store)
Your favorite color of Eye Love Hue Paint
Small Artist Brush (Or Larger for a larger plaque)
WoodUBend Mouldings of your choice
Clear Coat to seal Leaf
Step 1:

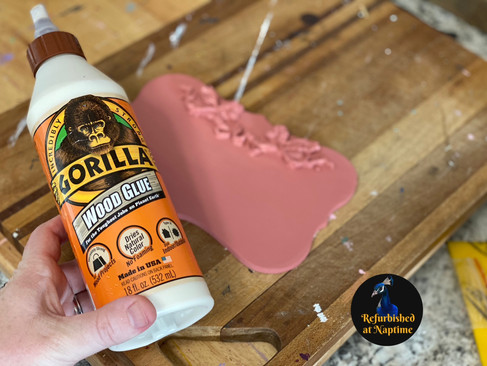
After insuring your plaque is smooth and dust free you can start by applying your WoodUBend pieces. Using your Heat Gun apply heat 3-6" away from your mould to ensure they do not burn. Using a back and forth motion this will allow your mould to become flexible and bendable to the surface you are using them on. Once it feels spongy it ready to be glued on. You will need to use a Wood Glue. I highly recommend Gorilla glue as it dries clear, has no smell and hold really well. Apply a thin coat, to the back of the mould, press onto your plaque and hold applying pressure for a good 30 seconds. Wipe away any excess glue from the edges and allow to dry.


Step 2:
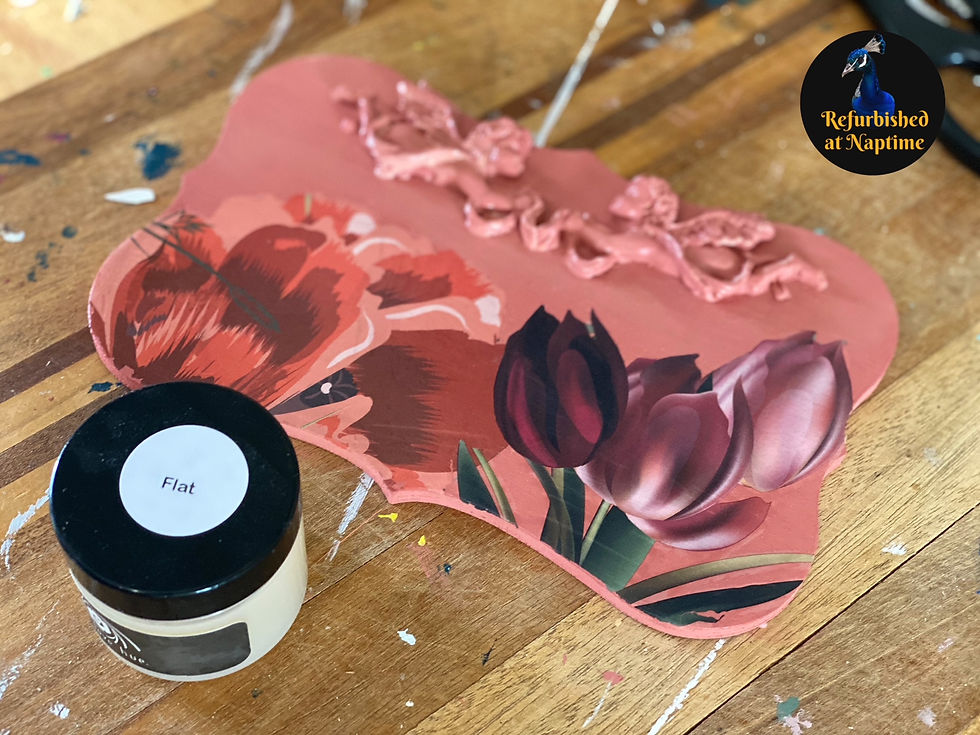
Once your WooduBend are good and dry you are ready to start painting. For this project I used Eye Love Hue Paint's brand new color, Dusty Desert Pink. This is a very earthy shade of rose. You can paint right over your WoodUbends. I did 2 coats of paint.
1st Coat 2nd Coat


Step 3:
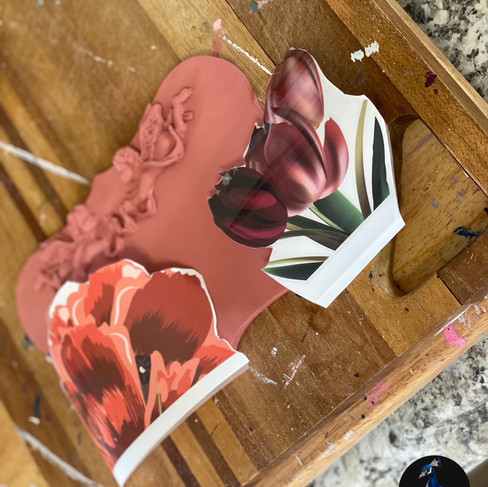
After your paint has dried (typically 24 hours) you can start applying your transfers. For this piece I used Tulips Fields from HP Distribution LLC. This is a large transfer that I only used 2 small flowers out of.
Once you press your transfer down, apply with your transfer tool, until it has completely adhere. You can then pull your transfer back up slowly to separate the clear page from the plaque. If you find a spot that doesn't stick simply put your transfer back down and continue to rub on it until it does. Once the entire design has adhered, pull your clear page off and lightly press down to smooth the entire transfer and prevent any bubbles. Then clear coat over your transfer to seal it on.


Step 4:
Let's Start applying some gold leafing! Using a cheap crayola brush I applied Mona Lisa Metal Leaf Adhesive in small amounts. You don't need a lot as it is thin and spreads easily. It's recommended to work in small areas at a time. Since this was a small project and I was working quickly I did the moulds and borders at the same time.

You can use scrap pieces from left over projects if you want a distressed or broken design. Otherwise, if you wish to have a completely smooth design you can use brand new sheets. You can find 100 sheets of gold leaf on Amazon for a great price! Once your glue has become tacky you are ready to start laying the gold lead down. Slowly lay down your gold leaf over where the glue was applied. Using a sponge brush put it down into the mould or edging to get it into the crevices. Do not scrap the gold leaf as it tears very easily. Once you have your entire area covered that you applied the glue you can then lightly brush back over the gold leaf using the tip of the sponge brush. Any leaf that was applied to the glue will stick and the rest will fall off. This is a very messy art so be prepared for some clean up. Either do it outside without any air flow or inside but have a hand held vacuum handy to easily pick up the leaf when you are finished.
You can find a video of this exact project here: Skipping to 4:46 to see just the Gold Leaf Tutorial.

Final Step:
I recommend sealing your gold leaf as it will change tones if it is not sealed properly. Gold overtime can tarnish due to oxidation. When it is sealed correctly this helps to keep that lovely bright yellow.


Comments